
أتمتة نموذج باستخدام n8n خطوة بخطوة | Build an n8n Form Automation
تعلّم ببساطة، خطوة بخطوة
Learn simply, step by step
معلومة واضحة، ثم خطوة جديدة.
Clear knowledge, one step at a time.
أتمتة نموذج باستخدام n8n خطوة بخطوة Build an n8n Form Automation
أتمتة نموذج باستخدام n8n
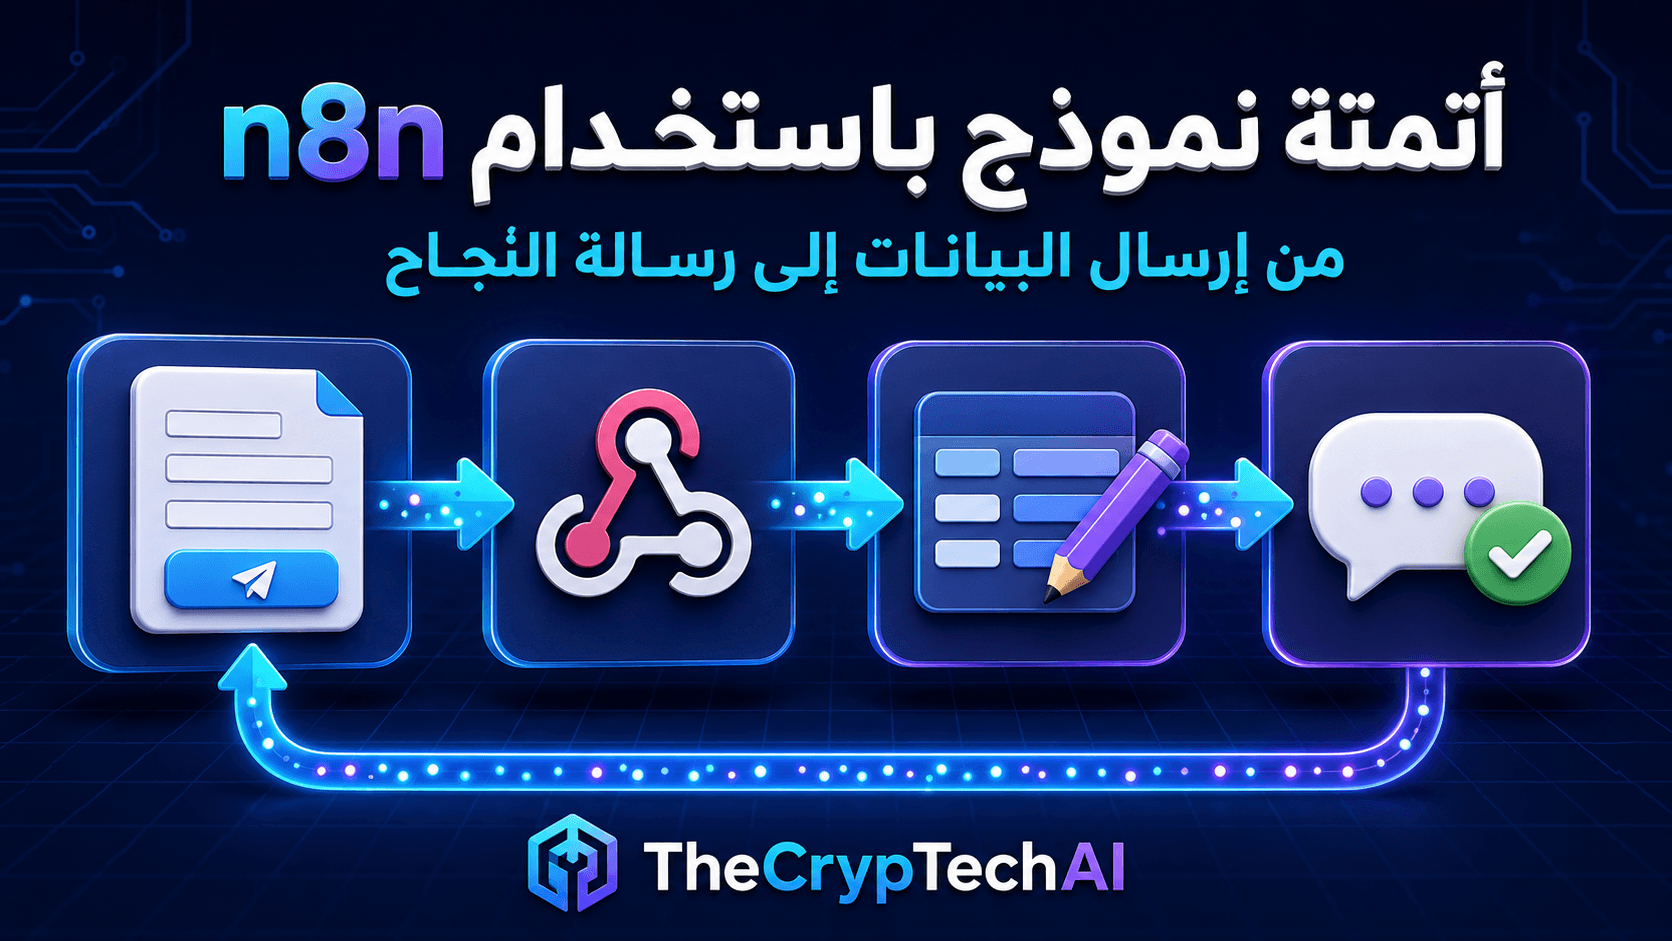
في هذا التطبيق سننفذ أتمتة نموذج باستخدام n8n. يستقبل Webhook بيانات الاسم والبريد الإلكتروني، ثم تنظم عقدة Edit Fields البيانات، وتعيد Respond to Webhook رسالة نجاح للمستخدم.
1. أضف Webhook Node
أنشئ Workflow جديدًا، ثم أضف عقدة Webhook واضبطها كالتالي:
- HTTP Method: POST
- Path: form-demo
- Respond: Using Respond to Webhook Node
استخدم Test URL أثناء التجربة، واضغط Listen for Test Event حتى تصبح العقدة جاهزة لاستقبال البيانات.
2. أنشئ نموذجًا بسيطًا
استبدل YOUR_TEST_WEBHOOK_URL برابط الاختبار الموجود داخل Webhook Node:
<form action="YOUR_TEST_WEBHOOK_URL" method="POST">
  <input type="text" name="name" placeholder="الاسم" required>
  <input type="email" name="email" placeholder="البريد الإلكتروني" required>
  <button type="submit">إرسال</button>
</form>
عند إرسال النموذج، تنتقل البيانات مباشرةً إلى Webhook داخل n8n.
3. نظّم البيانات باستخدام Edit Fields
أضف عقدة Edit Fields (Set) بعد Webhook، ثم أنشئ الحقول التالية باستخدام Expressions:
- name:
{{$json.body.name}} - email:
{{$json.body.email}} - status: received
شغّل العقدة وتأكد من ظهور الاسم والبريد الإلكتروني بصورة صحيحة في المخرجات.
4. أرسل رسالة النجاح
أضف عقدة Respond to Webhook بعد Edit Fields، ثم اختر الاستجابة بصيغة JSON وأدخل:
{
  "success": true,
  "message": "تم استلام البيانات بنجاح"
}
أعد إرسال النموذج. إذا كان المسار مضبوطًا بصورة صحيحة، ستظهر رسالة النجاح بعد وصول البيانات وتنفيذ العُقد.
5. الانتقال إلى التشغيل الفعلي
بعد اكتمال الاختبار، احفظ المسار وانشره أو فعّله، ثم استبدل Test URL داخل النموذج بـProduction URL.
لا تستخدم النموذج لجمع بيانات حقيقية قبل إضافة الحماية والتحقق من المدخلات. ويمكن إضافة Authentication أو CAPTCHA وتقليل عدد الطلبات لحماية الـWebhook من الرسائل المزعجة.
يمكنك زيارة
أدوات TheCrypTechAI المجانية
لرؤية أمثلة على خدمات يمكن ربطها مستقبلًا بمسارات الأتمتة.
وللتعرف على إعدادات استقبال الطلبات وإرسال الاستجابة، راجع
وثائق Webhook الرسمية في n8n.
الخلاصة
اكتملت أتمتة نموذج باستخدام n8n من خلال استقبال البيانات في Webhook، وتنظيمها باستخدام Edit Fields، ثم إرجاع رسالة نجاح عبر Respond to Webhook. ويمكن تطوير المسار لاحقًا لحفظ البيانات أو إرسال إشعار أو إنشاء طلب جديد.
Build an n8n Form Automation
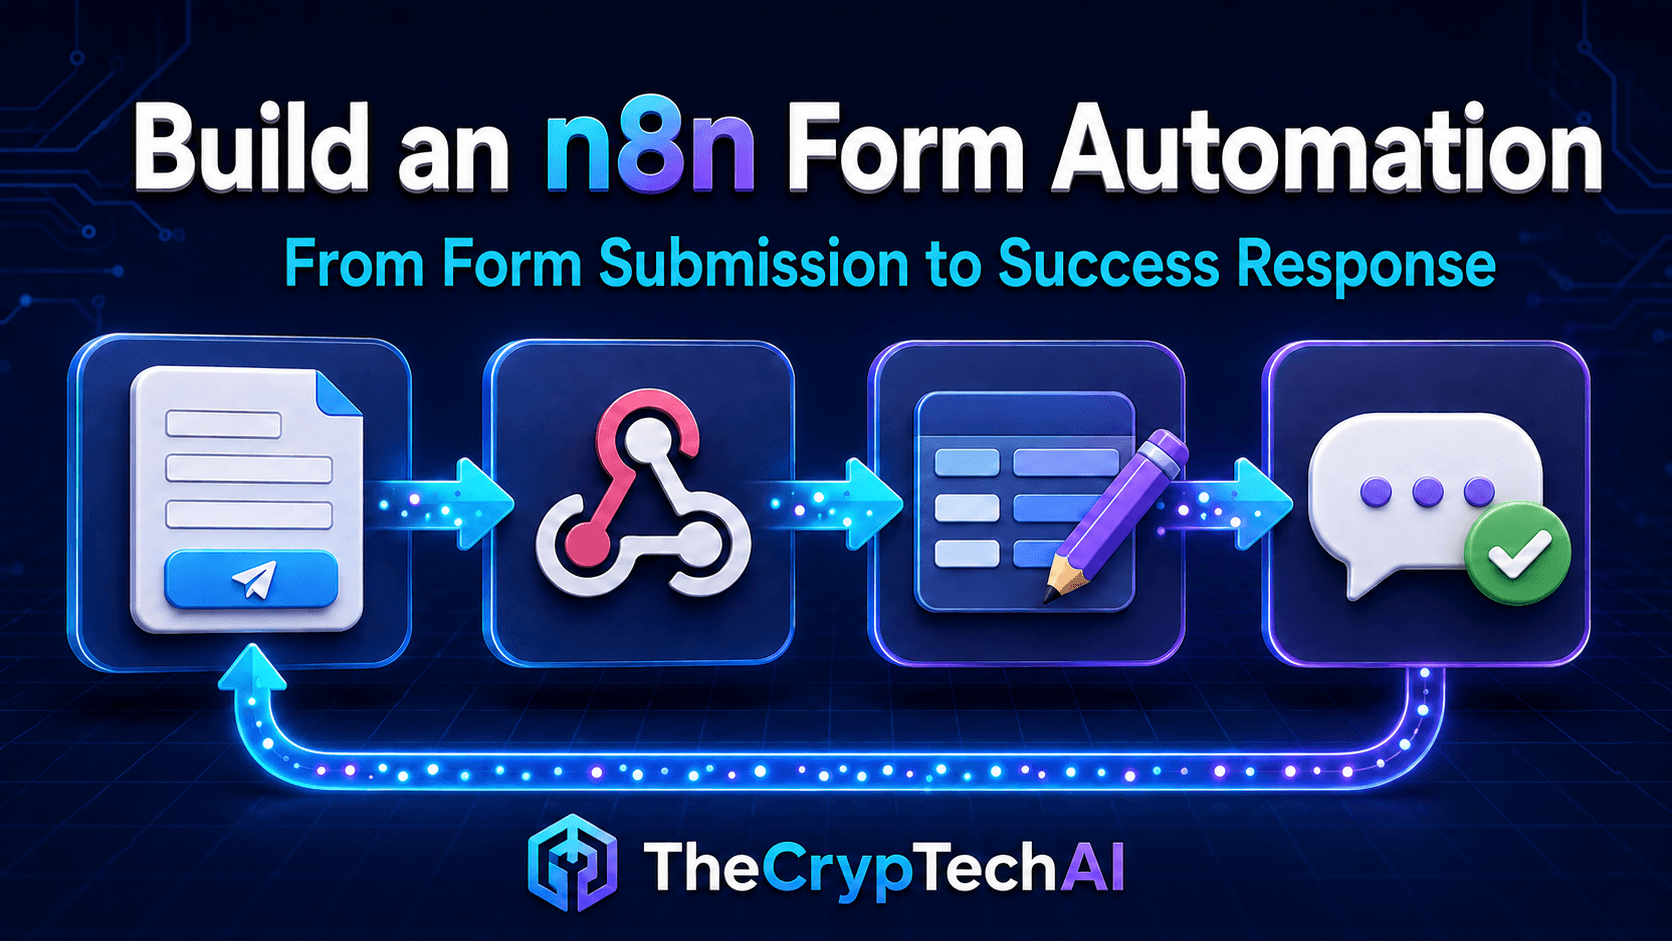
In this practical lesson, you will build an n8n form automation. A Webhook receives a name and email address, Edit Fields organizes the submitted information, and Respond to Webhook returns a success message to the user.
1. Add a Webhook Node
Create a new workflow, add the Webhook node, and use these settings:
- HTTP Method: POST
- Path: form-demo
- Respond: Using Respond to Webhook Node
Use the Test URL while building the workflow. Select Listen for Test Event so the node is ready to receive the submitted information.
2. Create a Simple Form
Replace YOUR_TEST_WEBHOOK_URL with the Test URL displayed inside the Webhook node:
<form action="YOUR_TEST_WEBHOOK_URL" method="POST">
<input type="text" name="name" placeholder="Name" required>
<input type="email" name="email" placeholder="Email" required>
<button type="submit">Send</button>
</form>
When someone submits the form, the browser sends the information directly to the Webhook node in n8n.
3. Organize the Data With Edit Fields
Add Edit Fields (Set) after the Webhook node. Create the following fields using expressions:
- name:
{{$json.body.name}} - email:
{{$json.body.email}} - status: received
Run the node and confirm that the submitted name and email address appear correctly in its output.
4. Return a Success Response
Add Respond to Webhook after Edit Fields. Choose a JSON response and enter:
{
"success": true,
"message": "The data was received successfully"
}
Submit the form again. If the workflow is configured correctly, the success response will appear after n8n receives and processes the information.
5. Move to Production
After completing the test, save and publish or activate the workflow. Replace the Test URL in the form with the Production URL.
Do not collect real information before adding appropriate protection and input validation. Authentication, CAPTCHA, and request limits can help protect the Webhook from unwanted submissions.
Explore the
free tools available from TheCrypTechAI
to see examples of services that could be connected to future automation workflows.
For more information about receiving requests and returning responses, read the
official n8n Webhook documentation.
Key Takeaway
This n8n form automation receives submitted information through a Webhook, organizes it with Edit Fields, and returns a success message with Respond to Webhook. You can later expand the workflow to save the data, send a notification, or create a new request.
اختبر فهمك
Check Your Understanding
سؤالان سريعان لتثبيت أهم ما تعلمته.
Two quick questions to reinforce the key ideas.